Product Overview
Leather Color Refinishing Kit SA7.cl by Leather Doctor degreases, rinses, hydrates, softens, seals, color coat, top coat, and protects the leather.
Most of these repairs may range from missing finishes to abrading damages to the leather structure. Some exposed areas may be contaminated with foreign soiling including conditioners, protectors, body oil, grease, and sweat, or alkaline overexposure from cleaners.
A comprehensive repair for a long-term lasting solution will require a holistic approach to deal with both the exposed structure and surface finishes.
The practical and functional softness and strength of the leather depend on the health of the structure with an average thickness between 0.9 to 1.2mm from stiffness and cracking.
The aesthetic aspect of the leather finishes averages 0.02mm (or 20 microns) in thickness for practical compressing and flexing from cracking.
A leather-safe restoration system begins by stripping with Stripper 2.3 and rinsing with Rinse 3.0. Degreasing with Degreaser 2.2 follows with Acidifier 2.0.
The suffix numbers of these four products denote its pH value for recharging the protein fiber ionic positive besides the act of decontamination.
The leather integrity is revitalized once the ionic attraction between the positive protein fiber and its negative leather constituents like the tanning agent and fatliquor (fat and oil) is initiated.
A leather rejuvenating system for softness and strength is accomplished with Hydrator 3.3 followed by Fatliquor 5.0. Surface uneven absorption is sealed with Adhesor 73 to reduce the need for color over-coating thus increasing its flexibility and stretchability from premature cracking.
Protector B imparts a non-stick rub-resistant surface with a buttery feel and reduces noises translating into less friction wear. As the leather surface is well lubricated it reduces compression when it comes to heavy body contact thus reducing compressed creases and wrinkles.
Instruction:
1: Stripping Existing Deteriorating Finishes:
2: Degreasing:
3: Hydrating to Remove Suspended Soiling:
4: Hydrating to Relax before Fatliquoring:
5: Fatliquoring:
6: Hydrator to Remove Sticky Residue:
7: Dry Prep:
8: Repairs:
9: Adhesion Promotion Coating:
10: Color Coating:
11: Topcoating:
12: Rub-Resistant Protection:
13: Color Shading Examples:
1: Stripping Existing Deteriorating Finishes:
1. 1: Before stripping existing finishes, cover and tape off frames, and trims and protect flooring.
1. 2: Stripper 2.3 is applied and removed with tools like Strip Brush 9, Eraser 4, and sandpaper feathering out seamlessly, and towel extract for an even appearance.
2: Degreasing:
2. 1: Degreaser 2.2 is shaken up to 5 mins to gel before use.
2. 2: Degreaser 2.2 is transferred to leather Brush 1 or Eraser 4; agitate to saturate the stain, and feather out to the entire section.
2. 3: Degreaser 2.2 suspended soiling is towel extracted until it shows clean.
2. 4: Acidifier 2.0 is applied and towel extract until it shows clean to a healthy squeak.
3: Hydrating to Remove Suspended Soiling:
3. 1: Hydrator 3.3 is applied saturating the stain area and feathering out for an even appearance.
3. 2: Hydrator 3.3 soaked Towel 5 is placed over the grease stain area without airspace to trap wick-up stains instead of remaining on the leather surface as it dries.
3. 3: Towel 5 when crispy dry is peeled off and Eraser 4 is used to erase surface residue before fatliquoring.
3. 4: Hydrator 3.3 on semi-aniline leather another function is to activate dormant dyestuff to resurface.
4: Hydrating to Relax before Fatliquoring:
4. 1: Hydrator 3.3 is applied to the entire panel with a darkening effect without a drying edge.
4. 2: Hydrator 3.3 relaxing effect is further worked out to eliminate leather stiffness to satisfaction and excess is extracted until the towel shows clean and is then ready for immediate fatliquoring.
5: Fatliquoring:
5. 1: Fatliquor 5.0 is applied to the entire panel with a darkening effect without a drying edge.
5. 2: Fatliquor 5.0 application is repeated each time the water contents evaporate until it is fully saturated.
5. 3: Fatliquored leather is left to natural drying and any shining surface or sticky feel with fingers is removed with Hydrator 3.3.
6: Hydrator to Remove Sticky Residue:
6. 1: Hydrator 3.3 is applied to the sticky surface and brushed with Leather Brush 1 to drive the remaining surface remnants free of milky fat and oil until it turns clear.
6. 2: Allow natural drying for extra softness.
7: Dry Prep:
7. 1: Eraser 4 is used to erase wick-up residue before sanding accordingly.
7. 2: Find sanding to remove dry rotting and or deteriorating finishes.
8: Repairs:
8. 1: Refer to Leather Repair Kit A8.r
9: Adhesion Promotion Coating:
9. 1: Leather Adhesor 73 is scrubbed with a 3M white pad to remove some deteriorating finishes and lint-free towel extract until the towel shows clean.
9. 2: Another application is to smooth surface abrasion
and promote adhesion coating for further coating.
10: Color Coating:
10. 1: Leather Paint Micro 54 concentrate has to be mixed with distilled water before application. Recommended airbrushing application for vertical panels will require less than a 1: 1 mixing ratio from streaking besides technique of application to produce professional results.
10. 2: First coating is recommended with padding and subsequent coating with airbrushing.
10. 3: Fine dry atomize dispersion with more air is achieved with 80 to 100psi of air pressure.
10. 4: Light spray is preferred and let dry in between coats to build up color.
11: Topcoating:
11. 1: Leather Paint Topcoat 54 is applied by airbrushing for professional results.
11. 2: Use a lint-free paper towel to even out drips and streaks.
11. 3: Speed dries between coats with the help of a hair dryer.
11. 4: 2000-grit sanding may be applied to improve touch and appearance.
12: Rub-Resistant Protection:
12. 1: Protector-B is applied and redistributed with a foam brush or paper towel and ready for use when dry.
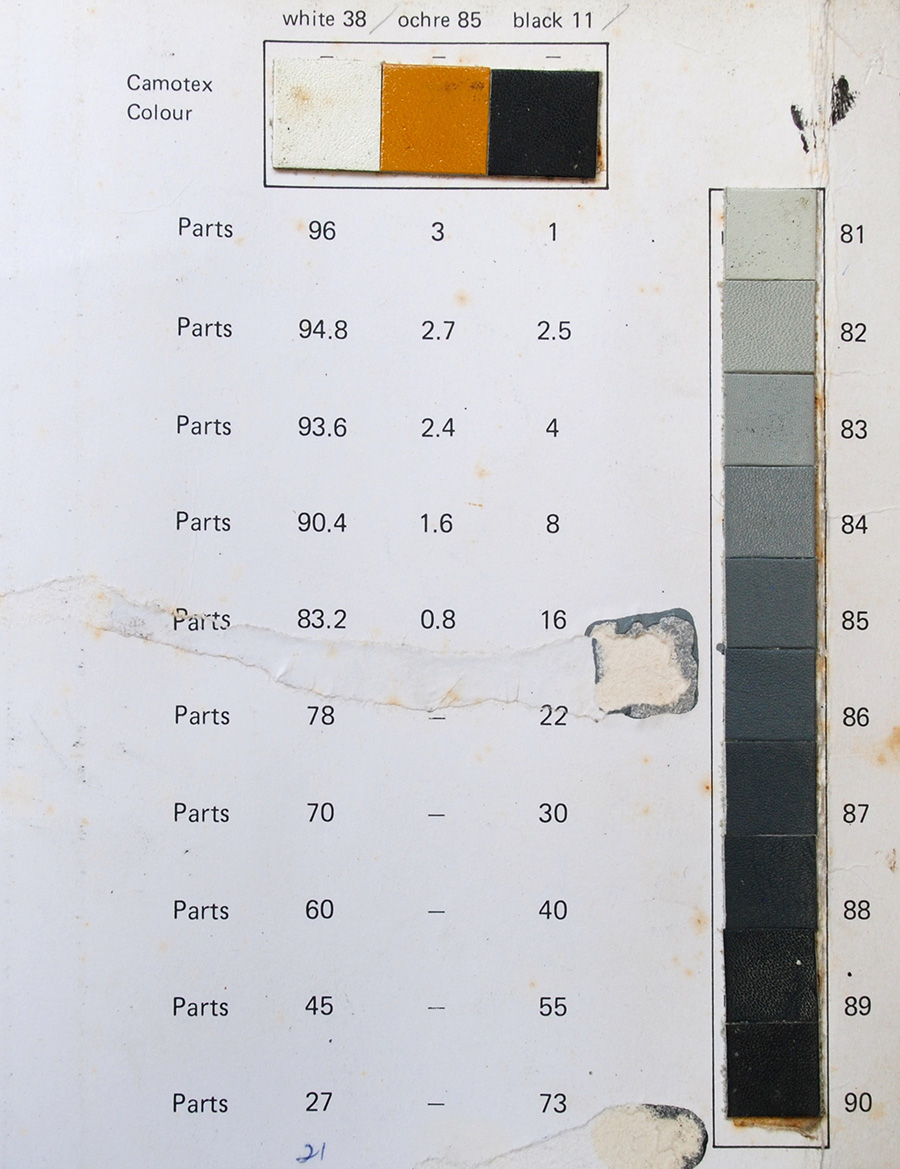
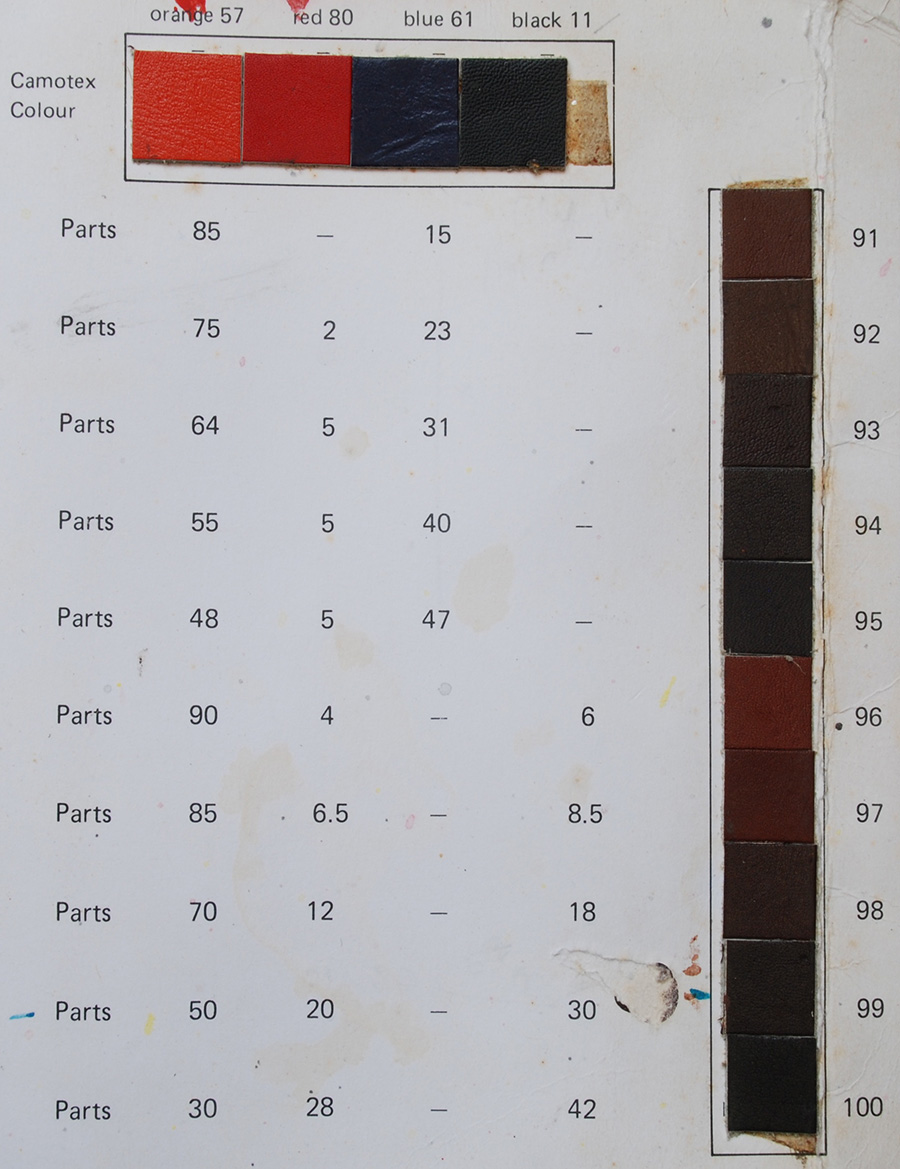
13: Color Shading Examples:
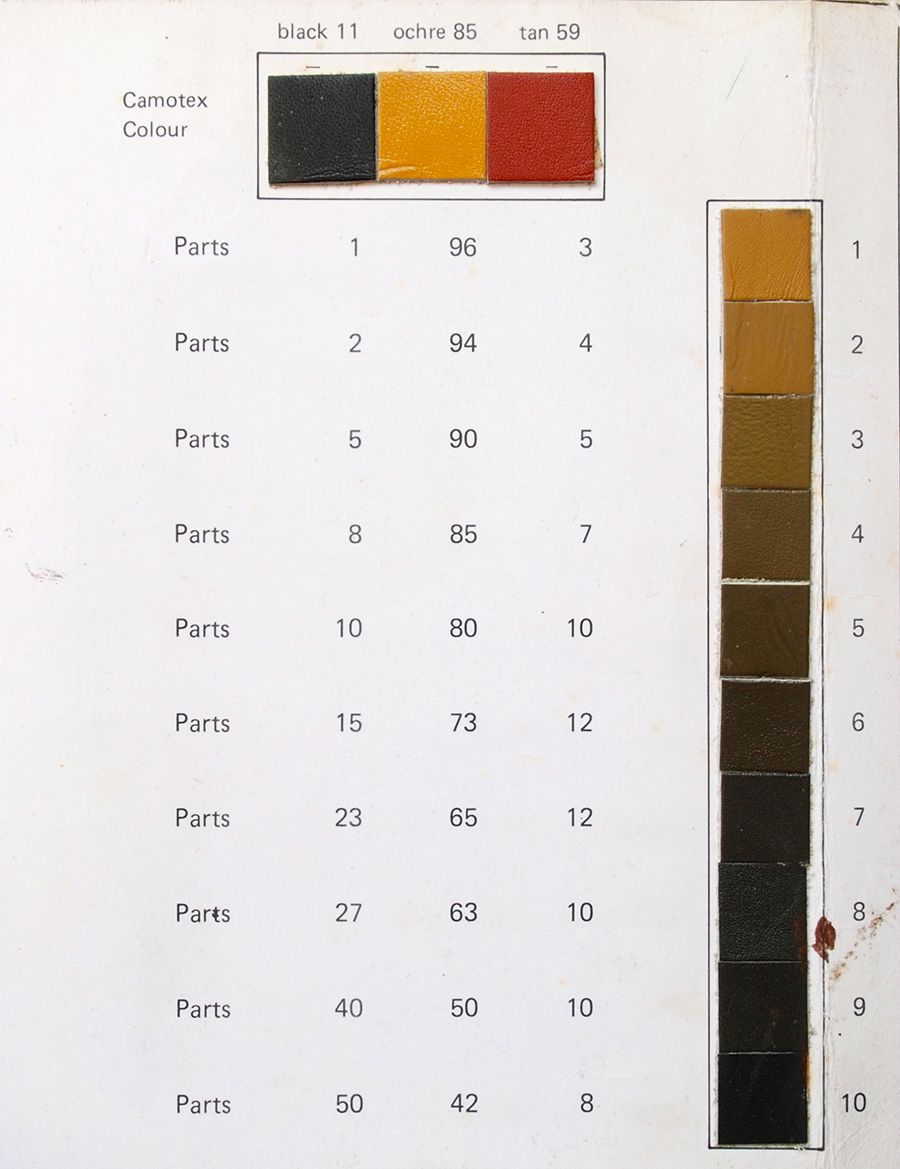
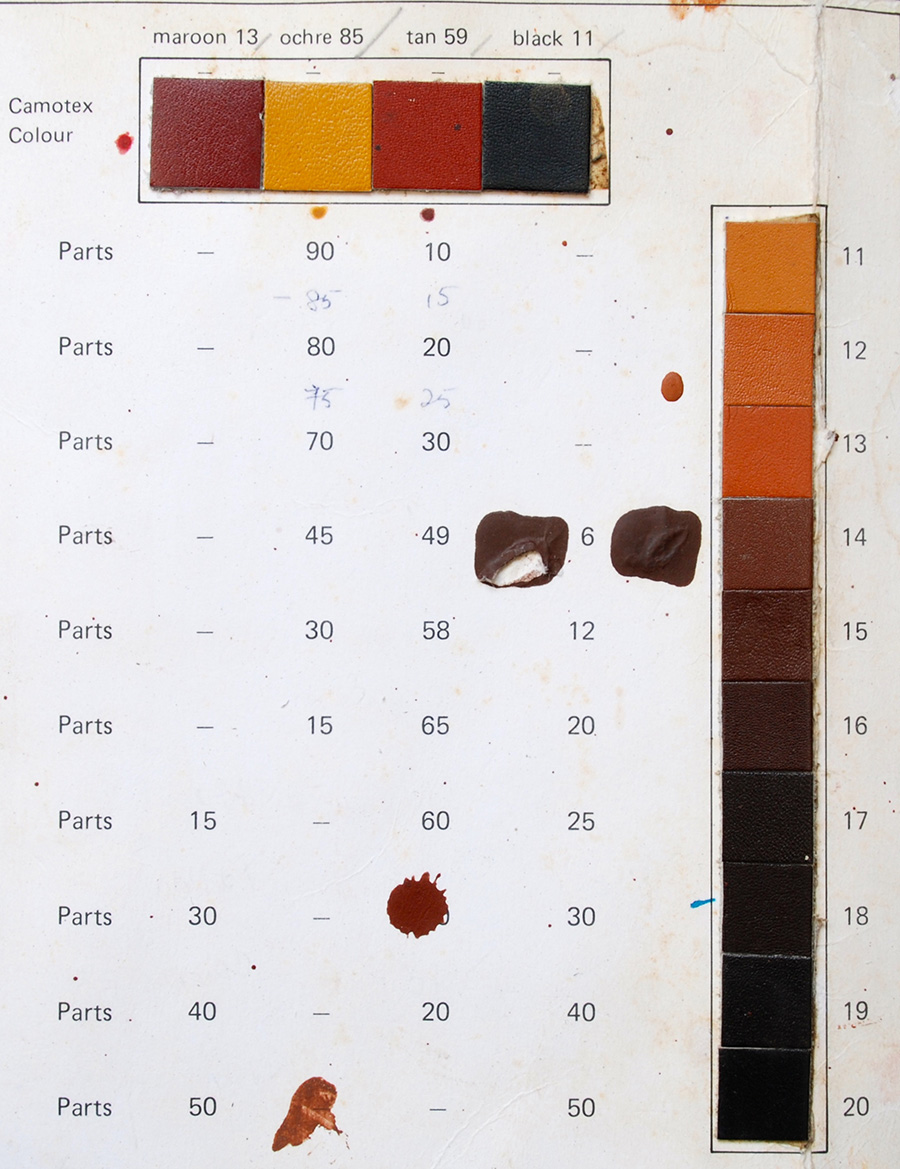
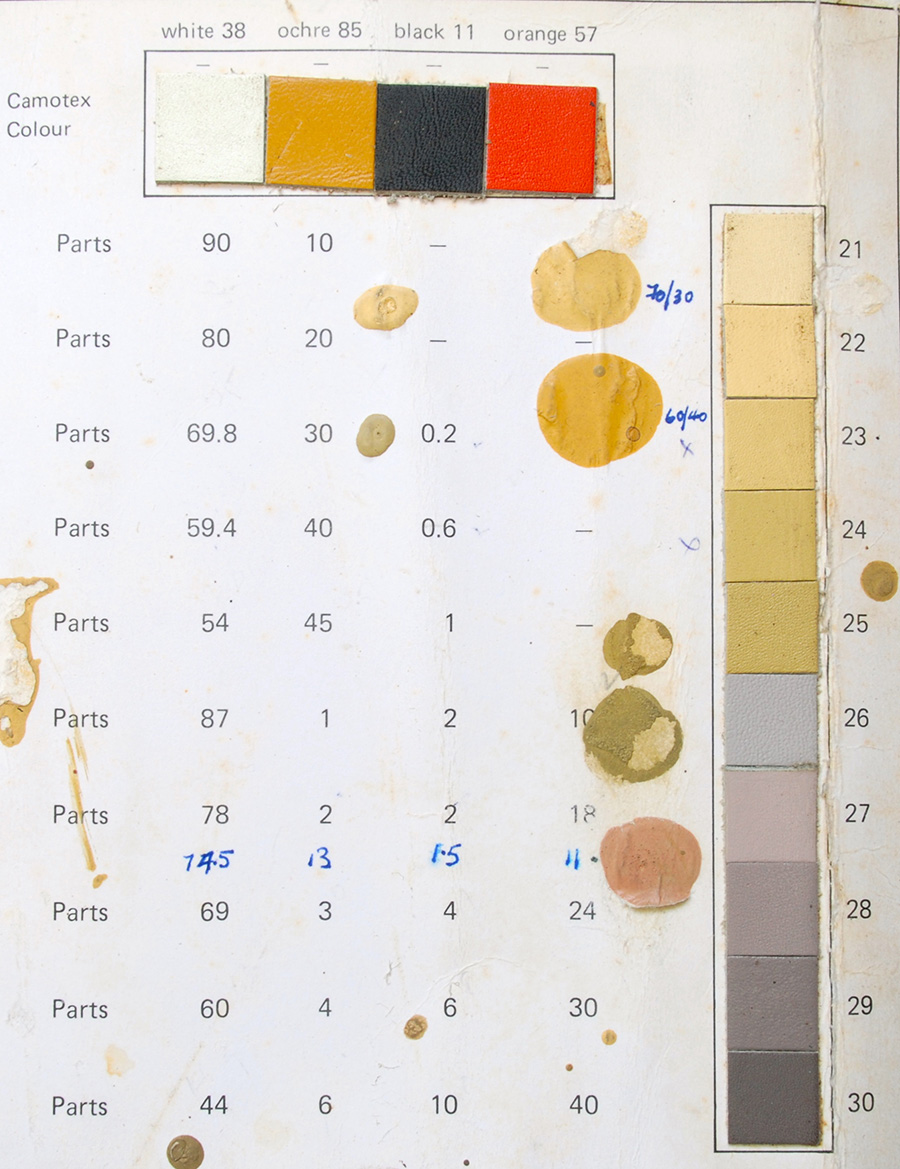
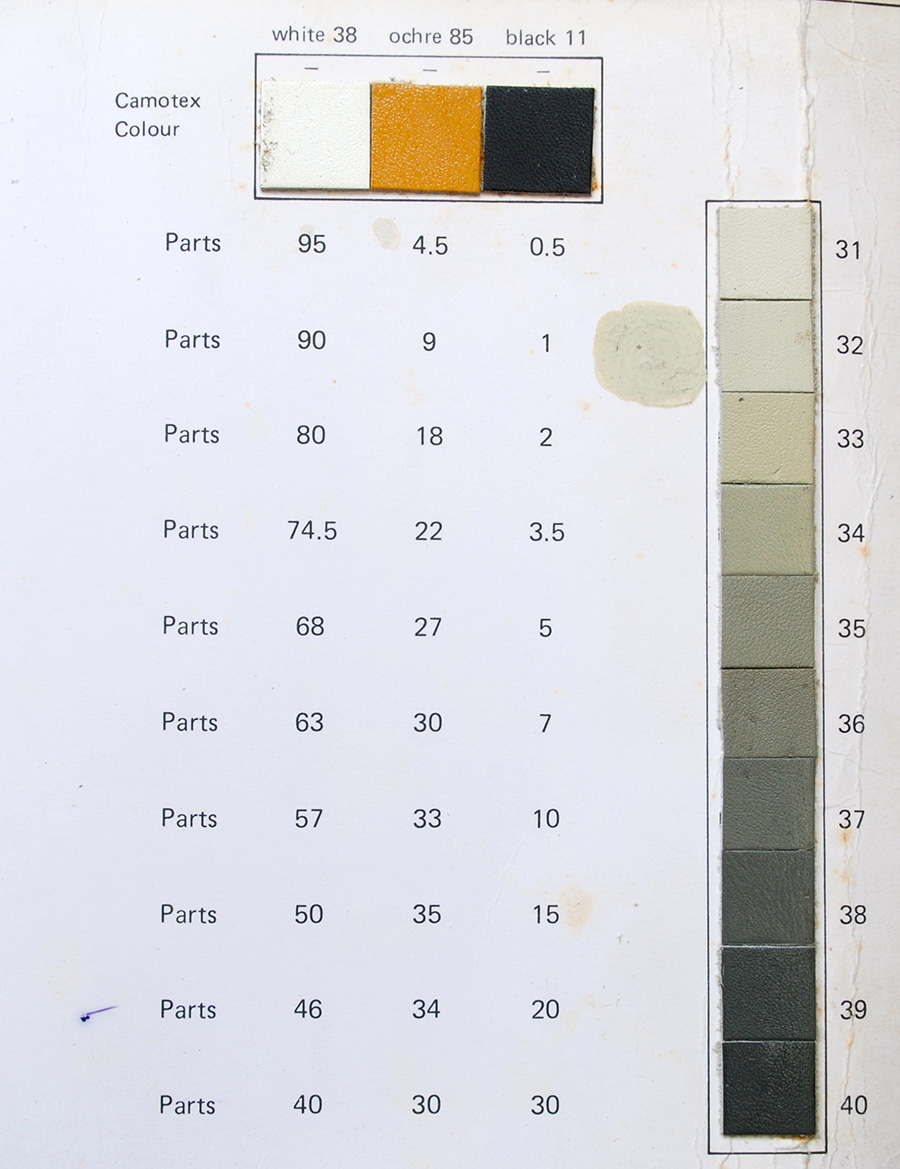
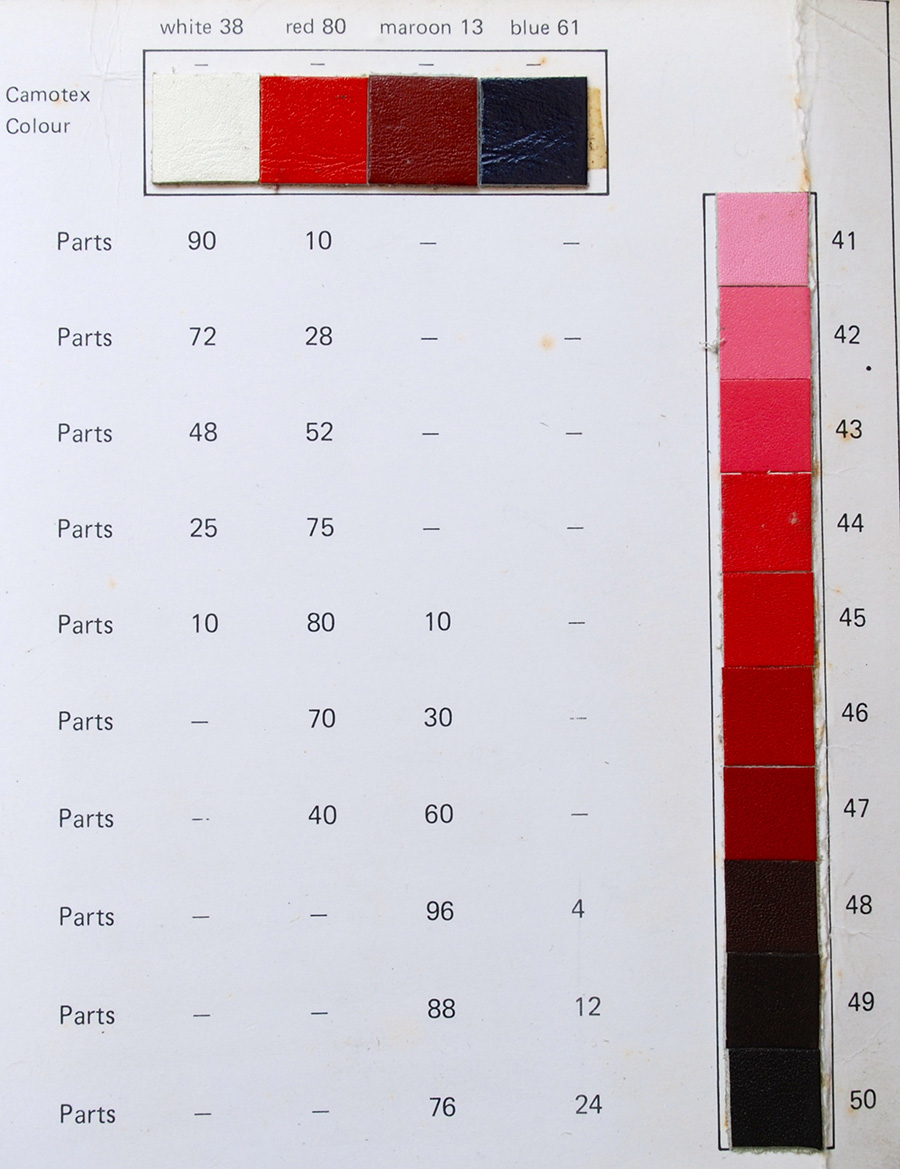
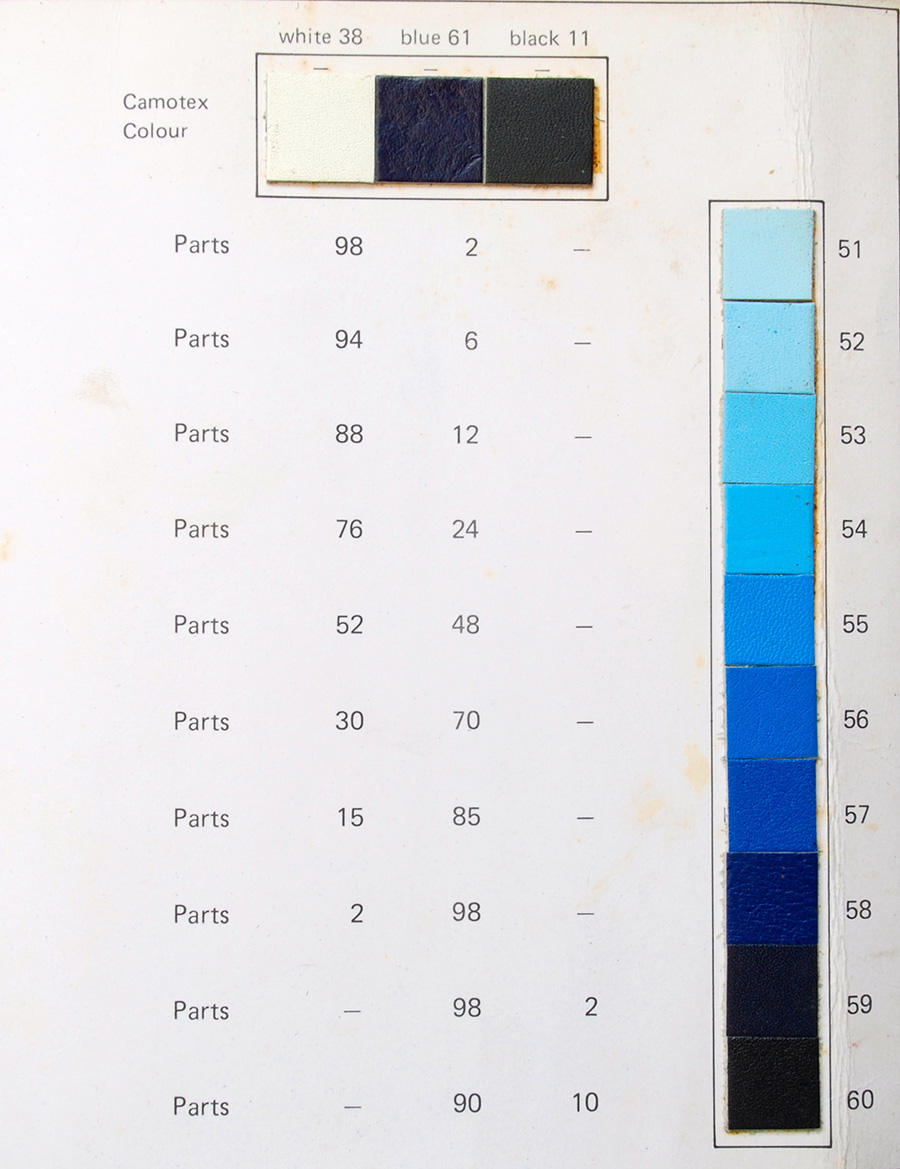
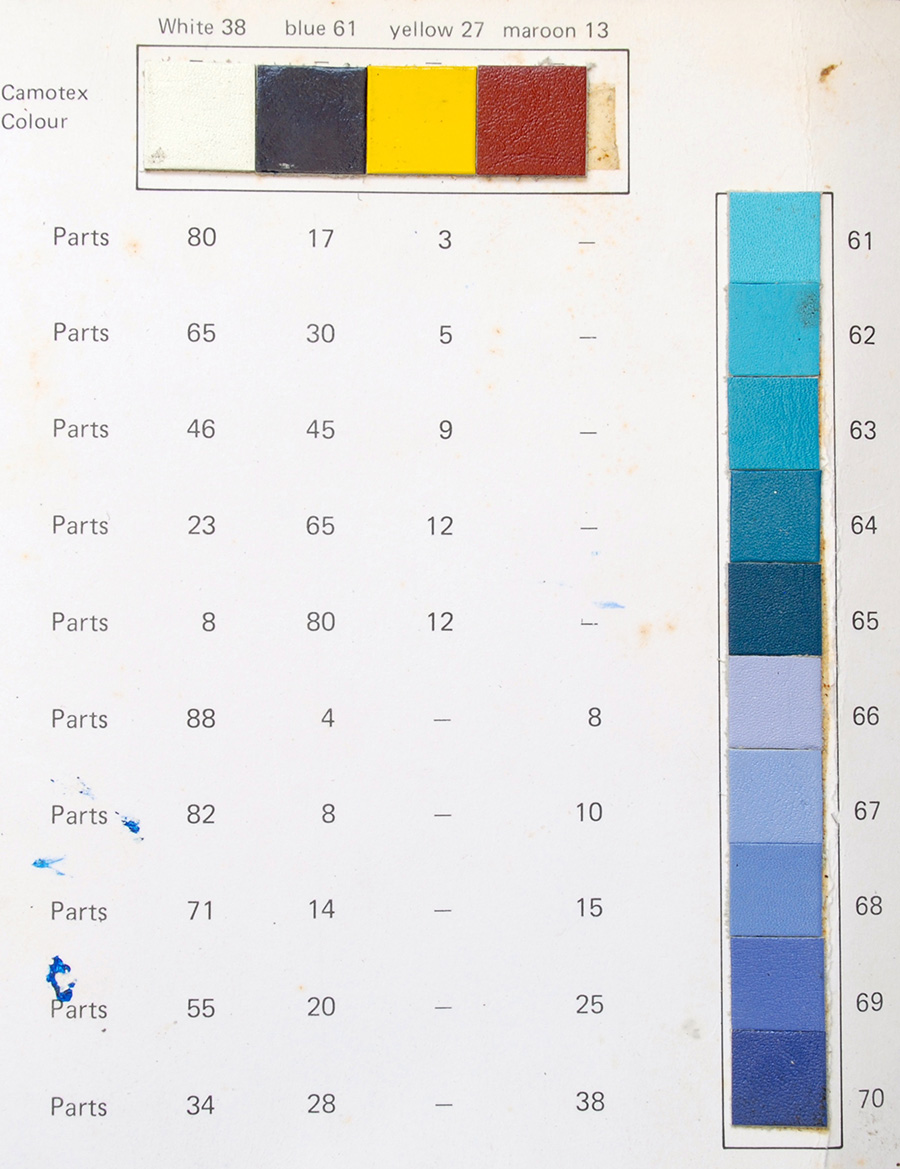
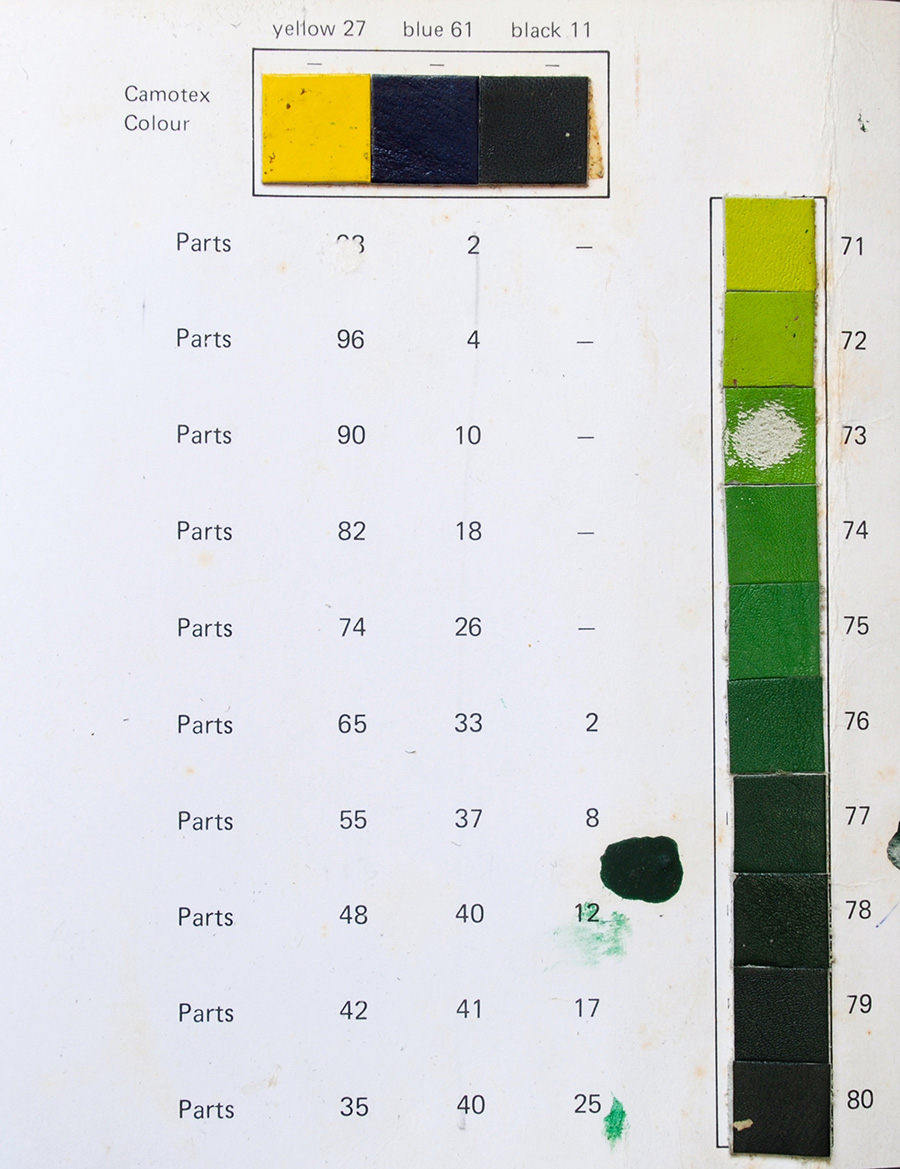
13. 1: Leather Paint Micro 54 by Leather Doctor is a fine micro pigment water-based compact resin blend with high UV fade resistance that syncs with Leather Paint Topcoat 54.
13. 2: Color shading will require parts based on weight.
